If the brakes of your vehicle are sticking to the wheels (infact to the brake rotors), the acceleration of your vehicle would be affected alongwith an increased fuel consumption. Brakes stick when the driver is not pushing on the brake pedal but the wheel is still held by the brake pads. It can be easily found out by jacking up the vehicle and rotating the wheels with hands. If the wheel sticks and is hard to rotate, you need to repair your brake system for that particular wheel. The cause may be sticking slider bolts, stuck caliper piston or jammed flexible brake hose.
Another cause of sticking brakes is the overfilling of the brake fluid reservoir. In my case, a professional workshop had overfilled the brake reservoir and there was no space for the brake fluid to go once the brakes were released. Therefore, do not fill the brake reservoir beyond the maximum mark, or ideally keep the level between the mini and maxi marks.
I am covering all three cases here. Here I am doing it on the front caliper of the Renault Espace with 2.2L J7T engine. After the necessary diagnostic, if you are replacing your flexible brake hose, then cut a piece of old hose to be used for pushing out the caliper piston.
Attach this piece of old flexible hose to the brake caliper.
A mechanical pump can be used to push out the caliper piston. Attach the nozzle of the pump to the brake hose of the caliper and pump it. Below you can see that the piston has been pushed out.
Here is the caliper piston and its casing. Slider bolts are exposed too.
To clean the piston, we need a very fine material so as not to put scratches on it. Here I used the steel wool of 000 class. The steel wool mostly exists in 0,00,000, 0000 classes with increasing fineness.
Here is the 000 class steel wool and the piston. Gently rub the wool over the piston several times.
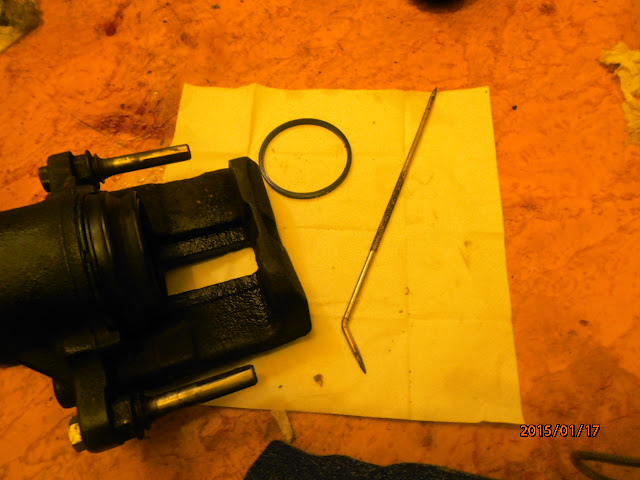
With a sharp-nosed tool, remove the rubber ring from the inside of the caliper cylinder. Now the groove of the rubber ring can be cleaned with brake cleaner fluid. Rubber ring or grommet is used to seal the piston.
Clean and install back the rubber ring (if it is in good shape). Lubriate the slider bolts with silicon grease (which would stick to the bolt longer) and assemble the caliper.
The brake pads have been assembled inside the caliper prior to mouting on the vehicle. keep the Inside and outside pads in their respective places and don't mix them. The Inside pad usually has a wear indicating wire attached to it.
The brake caliper has been mounted on the brake disc.
The new flexible brake hose attached to the caliper but not yet to the rigid brake line that goes to the brake master cylinder. Infact I had to make a bubble flare on the rigid line before attaching it to the flexible brake hose (the existing flare was cut by me because the old flexible brake hose was jammed in place and would not move).
This is the end of the brake line where a flare needs to be made.
I had to remove the whole rigid brake line from the vehicle to make a flare on it. Alternatively, you can use on-vehicle flare tools.
If you want to use a flare set like the one shown below, you would be disappointed. Even worse, you can get the wrong set. This set was for US vehicles and used inches whereas my vehicle was European. European vehicle manufacturers used metric units (very good!). Confirm the units, sizes of the flare dies and the maximum thickness of the brake lines for which the kit is valid before purchasing. Thickness of brake lines on my vehicle was more than this set could handle.
Below you can see the bubble flare on the end of the rigid brake line along with the flare nut of appropirate size done in a professional workshop. Some vehicles use double flare instead of bubble flare, so confirm it before launching yourself into this operation.
Now attach the rigid brake line to the flexible brake hose, refill the brake fluid, bleed the brakes and its done.


No comments:
Post a Comment